If you've recently rearranged your decor or moved into a new place, you might find yourself staring at unsightly nail holes in your walls. Fortunately, fixing these small blemishes doesn't necessarily require a new paint job. This beginner-friendly guide will walk you through the process of how to fix nail holes in walls without painting, using simple tools and materials readily available in most homes or local hardware stores.
Preparing to Fix Nail Holes in Your Walls
Before you begin the repair, understanding your wall's material—be it drywall, gypsum board, or plasterboard—is crucial as it influences the choice of filler and repair technique. Here's what you need to start:
Tools and Materials Needed
To address nail holes efficiently, gather the following items: - Spackle or joint compound - Putty knife or a simple plastic knife - Fine-grit sandpaper - Clean cloth or paper towel Optional: Toothpaste, soap, or a homemade mixture of baking soda and glue
Choosing the Right Filler
For most interior walls, lightweight spackle provides an easy-to-sand solution for small holes. For beginners, pre-mixed spackle from your local hardware store is user-friendly and effective. If you're out of spackle, alternatives like toothpaste or a paste made from baking soda and white glue can serve as temporary fixes.
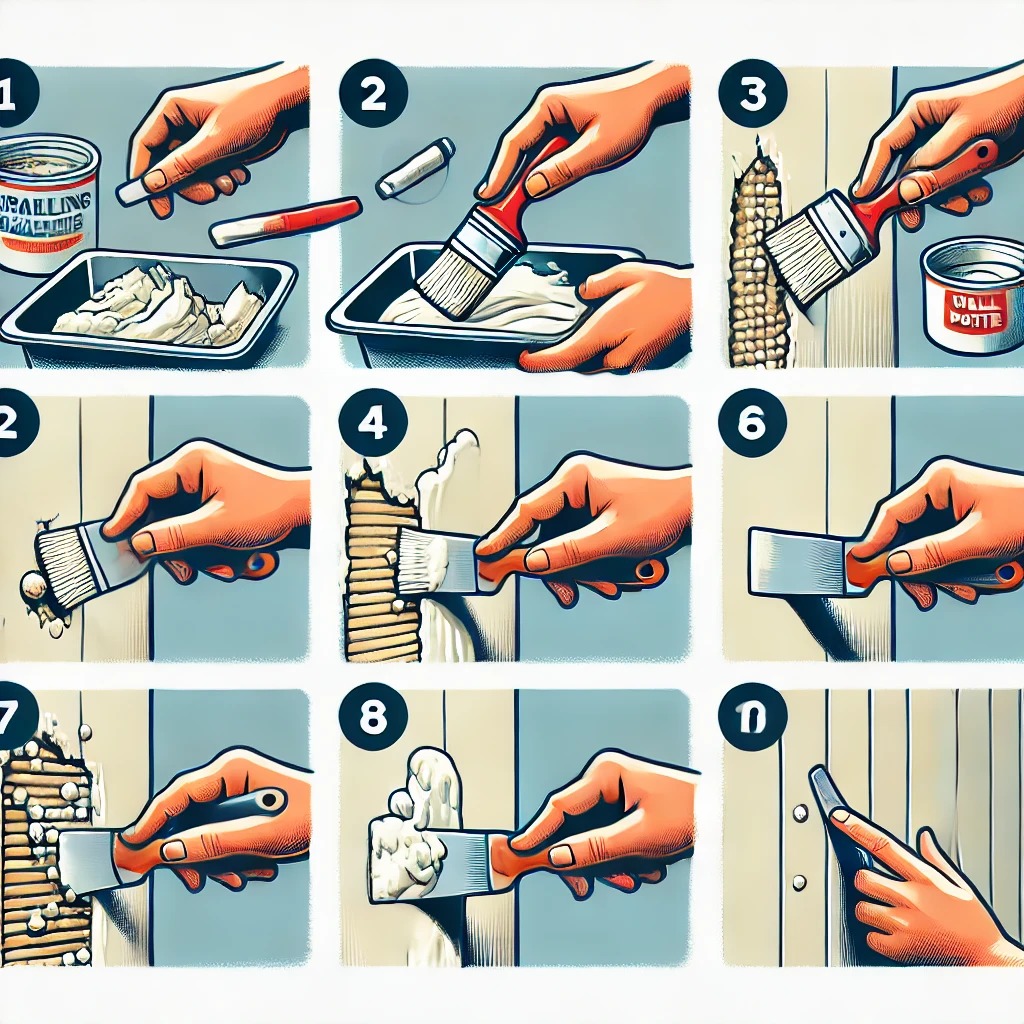
How to Fix Nail Holes in Walls Without Painting: A Step-by-Step Guide
Repairing nail holes is a straightforward DIY task that doesn't require extensive experience. Here’s how to achieve a smooth, clean wall surface without needing to repaint.
Step 1: Clean and Prepare the Hole
Start by removing any loose debris from the hole using a soft brush or vacuum. Wipe the area with a damp cloth to ensure no dust or particles interfere with the adhesion of your filler.
Step 2: Apply the Filler
Using your putty knife, apply a small amount of spackle directly into the hole. Press it in firmly and smooth over the surface, making sure it's level with the wall. For tiny holes, dotting in toothpaste or your homemade mixture can work just as well.
Step 3: Let It Dry and Sand the Area
Allow the filler to dry completely, which may take a few hours depending on the product and ambient conditions. Once dry, lightly sand the area with fine-grit sandpaper in a circular motion until the surface is flush with the wall.
Tips for Achieving a Professional-Looking Finish Without Painting
Achieving a seamless repair without painting can be challenging, but with the right techniques, your walls can look as good as new.
Sanding Techniques
When sanding, use a light touch and keep your movements even to avoid creating depressions in the wall. If using sandpaper, wrap it around a flat block to distribute pressure more evenly.
Choosing Spackle or Joint Compound
For best results, use lightweight spackle for small nail holes. Joint compound is preferred for larger holes or areas requiring thicker application, as it tends to shrink less upon drying.
Final Touches
After sanding, wipe down the wall with a damp cloth to remove all dust. If you notice any unevenness, apply a second, thinner layer of spackle and repeat the sanding process.
Frequently Asked Questions (FAQs)
Is there a way to fill nail holes without painting?
Yes, you can fill nail holes with a product that matches the wall color, like colored wax sticks or paintable caulk, to blend the repair without needing paint.
What is the best thing to fill holes in the wall with?
Spackling paste is generally considered the best option for filling small to medium-sized holes in walls due to its ease of use and effectiveness.
What is the best product to fill nail holes in drywall?
Lightweight spackling paste is often recommended for filling nail holes in drywall because it dries quickly and sands easily.
By following these steps and tips, you can easily fix nail holes in your walls without painting, making your walls look neat and well-maintained. This process not only saves you time but also keeps your living space looking its best. Whether you're a novice or just brushing up on your DIY skills, these simple techniques will help you tackle minor wall repairs with confidence. Remember, the key to a successful repair lies in careful preparation and patience during the application and sanding stages.